Loading...

Plugin Configuration and Integration

Read more about how to configure this plugin.

Plugin Features Purchase

Integration and Integration

Before you can use this plugin, ensure you have done Daraja API Integration by following the following steps:
You need to already have a Paybill from Safaricom. If do you not, you can apply for one from this link: https://m-pesaforbusiness.co.ke/ or talk to the Safaricom team on M-pesabusiness[at]safaricom.co.ke;
Create account on Safaricom Daraja portal, which is the site you use to do the API integration.
Test your application and go-live on Daraja Portal. You can simulate transactions to confirm they can be received.
Indicate the Confirmation URL where your payment notifications will be sent. Check the below section for more info about confirmationURL.
Go live on Daraja Portal. To do this, you will need to have username of a user from G2 ORG portal, so ensure you have an ORG account requested and created.
Feel free to reach out to me on email ([email protected]) if you want professional assistance of doing the above integration, which can get a bit too technical sometimes.

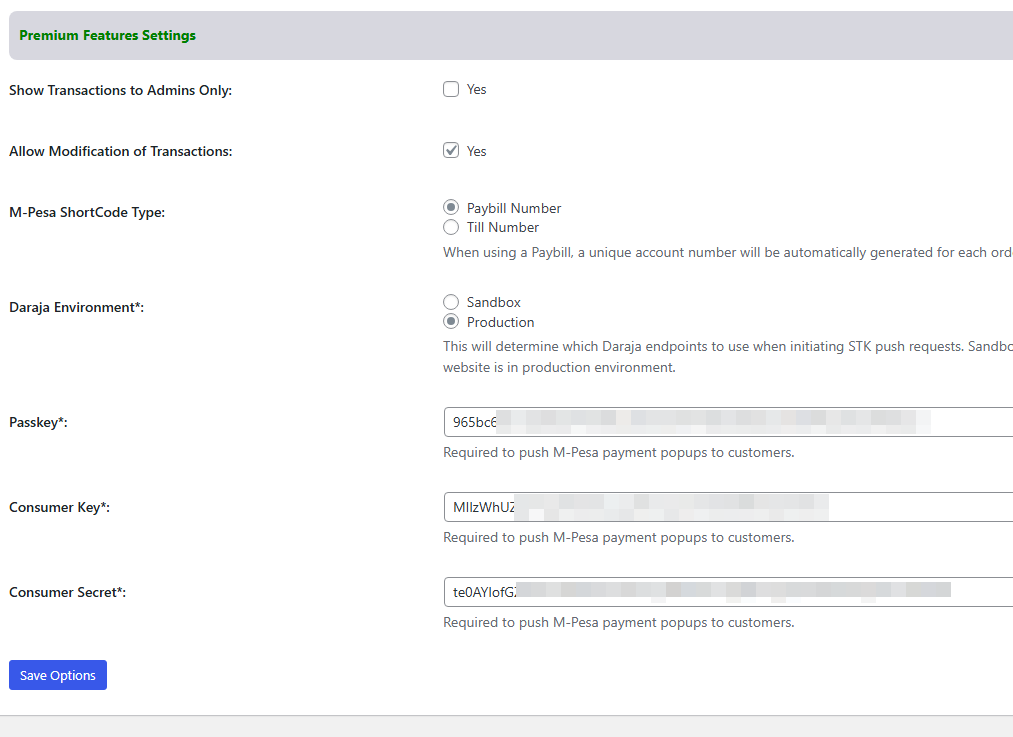
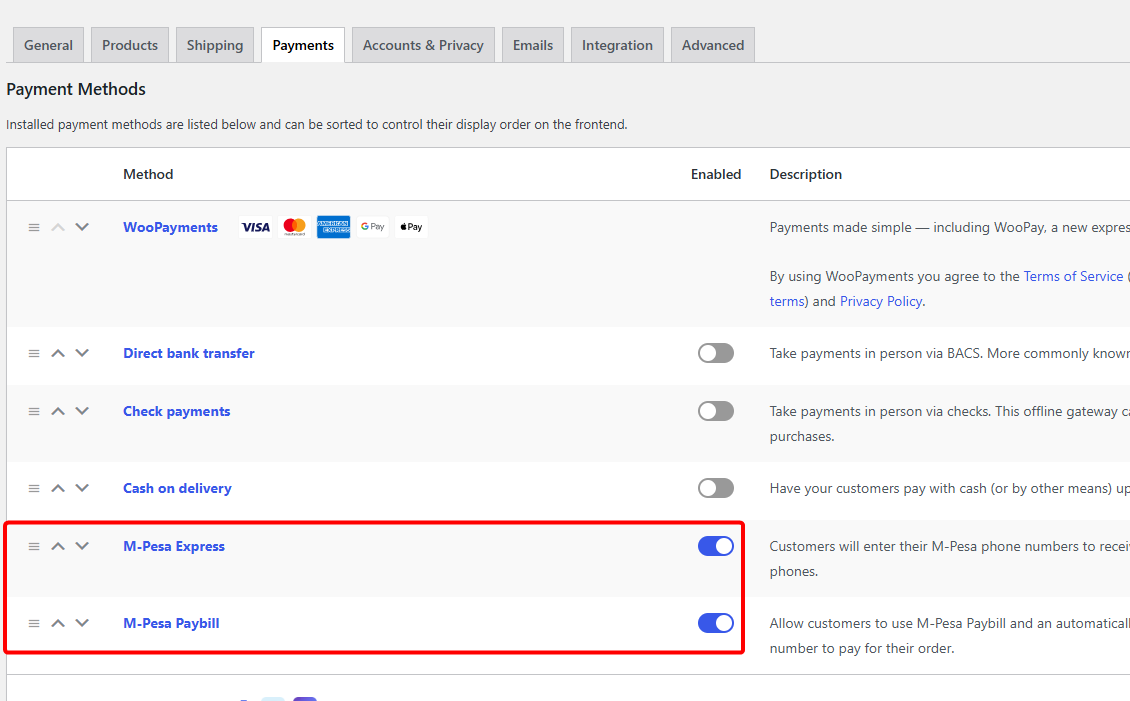
Plugin Installation & Configuration

Search "Receive M-Pesa Payments for WooCommerce" from the plugins section of your WordPress website.
Install and Activate the plugin.
Configure the plugin settings, indicating information like your shortcode number and the Daraja Confirmation URL. After this, you can start using the free plugin, though it has a limited set of features as compared the the Premium one.
Take note of the following points about confirmation URL. Note that if you misconfigure your confirmationURL, you may not not receive the payment notifications, or you interfere with the performance of your WordPress website.
IMPORTANT NOTES ABOUT CONFIRMATION URL:
  • You set the Confirmation URL when you are integrating your M-Pesa Paybill on Safaricom Daraja Portal.
  • To ensure payments are reflected on your website, the domain on the confirmation URL must match your WordPress website.
  • The confirmation URL cannot have the word mpesa in it.
  • The confirmation URL must be using https.
  • For added security, and to ensure your M-Pesa payment notifications are correctly processed, ensure your confirmation URL has a unique string to it. In case you have not settled on one, below are 5 uniquely generated confirmation URLs that you can use. Replace "yourwebsite" with your actual domain
    • https://yourwebsite/index.php?h=379272c3a55d3c65
    • https://yourwebsite/index.php?h=d098782eb551645e
    • https://yourwebsite/index.php?h=01449620a0b8a05f
    • https://yourwebsite/index.php?h=f16356c91da1df0d
    • https://yourwebsite/index.php?h=a4c393237644163f
    In case you want to update your confirmationURL to any of the ones above, you can do it as guided in the Safaricom Daraja portal.
Remember to enable the M-Pesa Paybill payment gateway from the Payments tab under WooCommerce Settings.
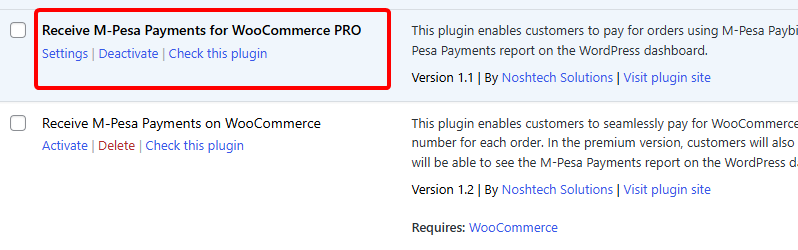
Upgrading to the Premium plugin:
Purchase the plugin using this link, indicating the website where you shall be installing the plugin, and optionally the URL of a dev website. The plugin activation code shall be sent to your email.
Copy the plugin activation code thay will have been sent token to your email.
Go to "Upgrade to Premium" tab on the Free plugin, input the activation code and submit.
Once you submit, your activation code will be verified and then plugin activated. For any issues, reach out to us via our email [email protected].
Once the activation code is veriied, the premium plugin will be automatically downloaded and installed. You can proceed to disable the Free plugin and enable the PRO plugin. All the features of the free plugin are already included in the PRO plugin. In case you cannot see the PRO plugin on the plugins list, please reach out to us via email and indicate the activation code that was sent to you.
Configure the additional settings of your Premium plugin by providing details such as Passkey, Consumer Key, Consumer secret among others as shown below, so that all features of your plugin are fully enabled.
Once all settings have been propery configured, you will now see 2 Payment Methods on the WooCommerce Payments section. Ensure they are enabled so t hat they can be presented to customers on the checkout page.

Know more about this Plugin

You can install the plugin directly from your WordPress dashboard by navigating to Plugins > Add New, then searching for "Receive M-Pesa Payments for WooCommerce". Once installed, activate it and follow the setup wizard. To unlock premium features like STK Push, secure access controls, and export options, you can upgrade to the Premium version from the plugin settings. For any enquiries, please reach out to us via [email protected]

The plugin has a free version, which allows you to receive payments using an M-Pesa paybill and automatically generated account number. The premium version allows you to receive payments using Till number and STK push, as well as to view and modify the M-Pesa transactions from your WordPress dashboard.

The plugin connects to Safaricom's M-Pesa APIs using your Paybill or Till number. You'll need API credentials from Safaricom's Daraja portal. Once configured, it can automatically detect incoming payments and match them to orders.

The plugin supports Paybill, Till Number, and M-Pesa STK Push (Pop-ups). With STK Push, customers simply enter their phone number and receive a prompt to approve payment, making checkout fast and seamless.

Yes, you can! The plugin provides a report showing the M-Pesa transactions. Additionally, the M-Pesa transaction number for each order is added in the WooCommerce orders list. You can also export the data to Excel (CSV) format with a single click for your records or accounting.

No worries. You can manually add transactions through the plugin settings. This is especially useful in case of missed callbacks or payments made outside the order flow. The status column on the Transactions list shows if a transaction has already been utilised or not, so it can help in knowing the status of a specific transaction.

The Safaricom Daraja credentials entered in the plugin settings remain securely on your website and are never transmitted externally. All communications are encrypted to ensure data integrity and confidentiality. Additionally, you retain full control over access to M-Pesa transaction records. Access to payment logs and sensitive data can be restricted to authorized users only, ensuring that your financial data remains protected at all times.

No developer is needed, as you can get all the information you need is on the Safaricom Daraja portal. The plugin comes with a guided setup wizard. Just input your M-Pesa API credentials and configure your Paybill or Till settings. However, we ar aware that there are steps that may be a little complicated, and you can contact us on [email protected] for technical support if you get stuck.

Unfortunately you cannot use the plugin with 3rd party paybills or till numbers, as you do not own the paybill, and therefore you cannot access its credentials on Safaricom Daraja portal.

Yes, the plugin works well with a multivendor stores.